Migration Guide: From Bose Cloud to AfterTouch
This guide walks through the complete process of migrating your SoundTouch speakers from Bose’s cloud services to AfterTouch, the replacement provided by soundtouch-service. By the end, your speakers will work fully independently of Bose’s servers.
For a shorter overview, see the Survival Guide. For safety considerations and rollback options, see the Migration & Safety Guide.
What you need
- A machine that is always on (Raspberry Pi, NAS, home server, or similar) to run the service
- A USB drive (FAT-formatted) to enable SSH on each speaker
- Your speakers must be on the same network as the service host
- About 15–30 minutes per speaker
Step 1: Install and start the service
Choose the option that fits your setup.
Download a pre-built binary (no Go required)
Download the soundtouch-service build for your platform from the
Downloads page (it explains which file to pick).
Make it executable and run:
# Linux / macOS example
chmod +x soundtouch-service
./soundtouch-service
The service starts on port 8000. Open http://localhost:8000 in your browser.
Install script (Raspberry Pi or on-device)
A one-line installer handles download, installation as a system service, and auto-start on boot. See the On-Device Install Walkthrough and External Host Walkthrough for the exact commands for each platform.
Docker Compose (recommended for home servers and VMs)
The repository ships a docker-compose.yml ready for this use case. Clone or download it, copy the example config, then edit .env before starting:
cp .env.example .env
# Edit .env:
#   SOUNDTOUCH_HOSTNAME=192.0.2.100   ← your server's address
#   SOUNDTOUCH_VERSION=v0.70.0          ← pin to a release tag instead of 'latest'
docker compose up -d
SOUNDTOUCH_HOSTNAME is the address your speakers will use to reach the service — use a hostname or IP reachable from the speaker, not localhost.
On Linux (Debian, Proxmox VE, Raspberry Pi OS, etc.) you can enable host networking for automatic speaker discovery. Uncomment the network_mode: host line in docker-compose.yml and remove the ports: section (they conflict with host networking). Without host networking, add your speakers by IP address in Step 4 instead.
For local overrides (e.g. switching to build: . during development), create a docker-compose.override.yml — Docker Compose picks it up automatically and it is not tracked in version control.
Note on
docker-compose.ci.yml: this file contains mock services used only for automated integration tests. It is not needed for your own deployment.
Docker run (Linux — with host networking for device discovery)
docker run -d \
  --name soundtouch-service \
  --network host \
  -v $(pwd)/data:/app/data \
  ghcr.io/gesellix/bose-soundtouch:latest
Docker run (macOS / Windows — manual device IP required)
docker run -d \
  --name soundtouch-service \
  -p 8000:8000 -p 8443:8443 \
  -v $(pwd)/data:/app/data \
  --env SERVER_URL=http://soundtouch.local:8000 \
  --env HTTPS_SERVER_URL=https://soundtouch.local:8443 \
  ghcr.io/gesellix/bose-soundtouch:latest
On macOS/Windows, device discovery via mDNS won’t work inside the container — you’ll add devices by IP address in Step 4.
go install (if you have Go installed)
go install github.com/gesellix/bose-soundtouch/cmd/soundtouch-service@latest
soundtouch-service
See Raspberry Pi Setup and the SoundTouch Service Guide for more deployment options.
Data directory: all methods store device state, presets, and settings in a
data/directory next to the binary (or mounted at/app/datain Docker). This directory is the single thing you need to back up — copying it is enough to restore a complete AfterTouch installation on a new machine. See Moving AfterTouch to Another Host for the full procedure, including the certificate authority your speakers already trust and what happens if the service’s address changes.
Step 2: Configure the service URL
Open http://<server>:8000 and go to the Settings tab.
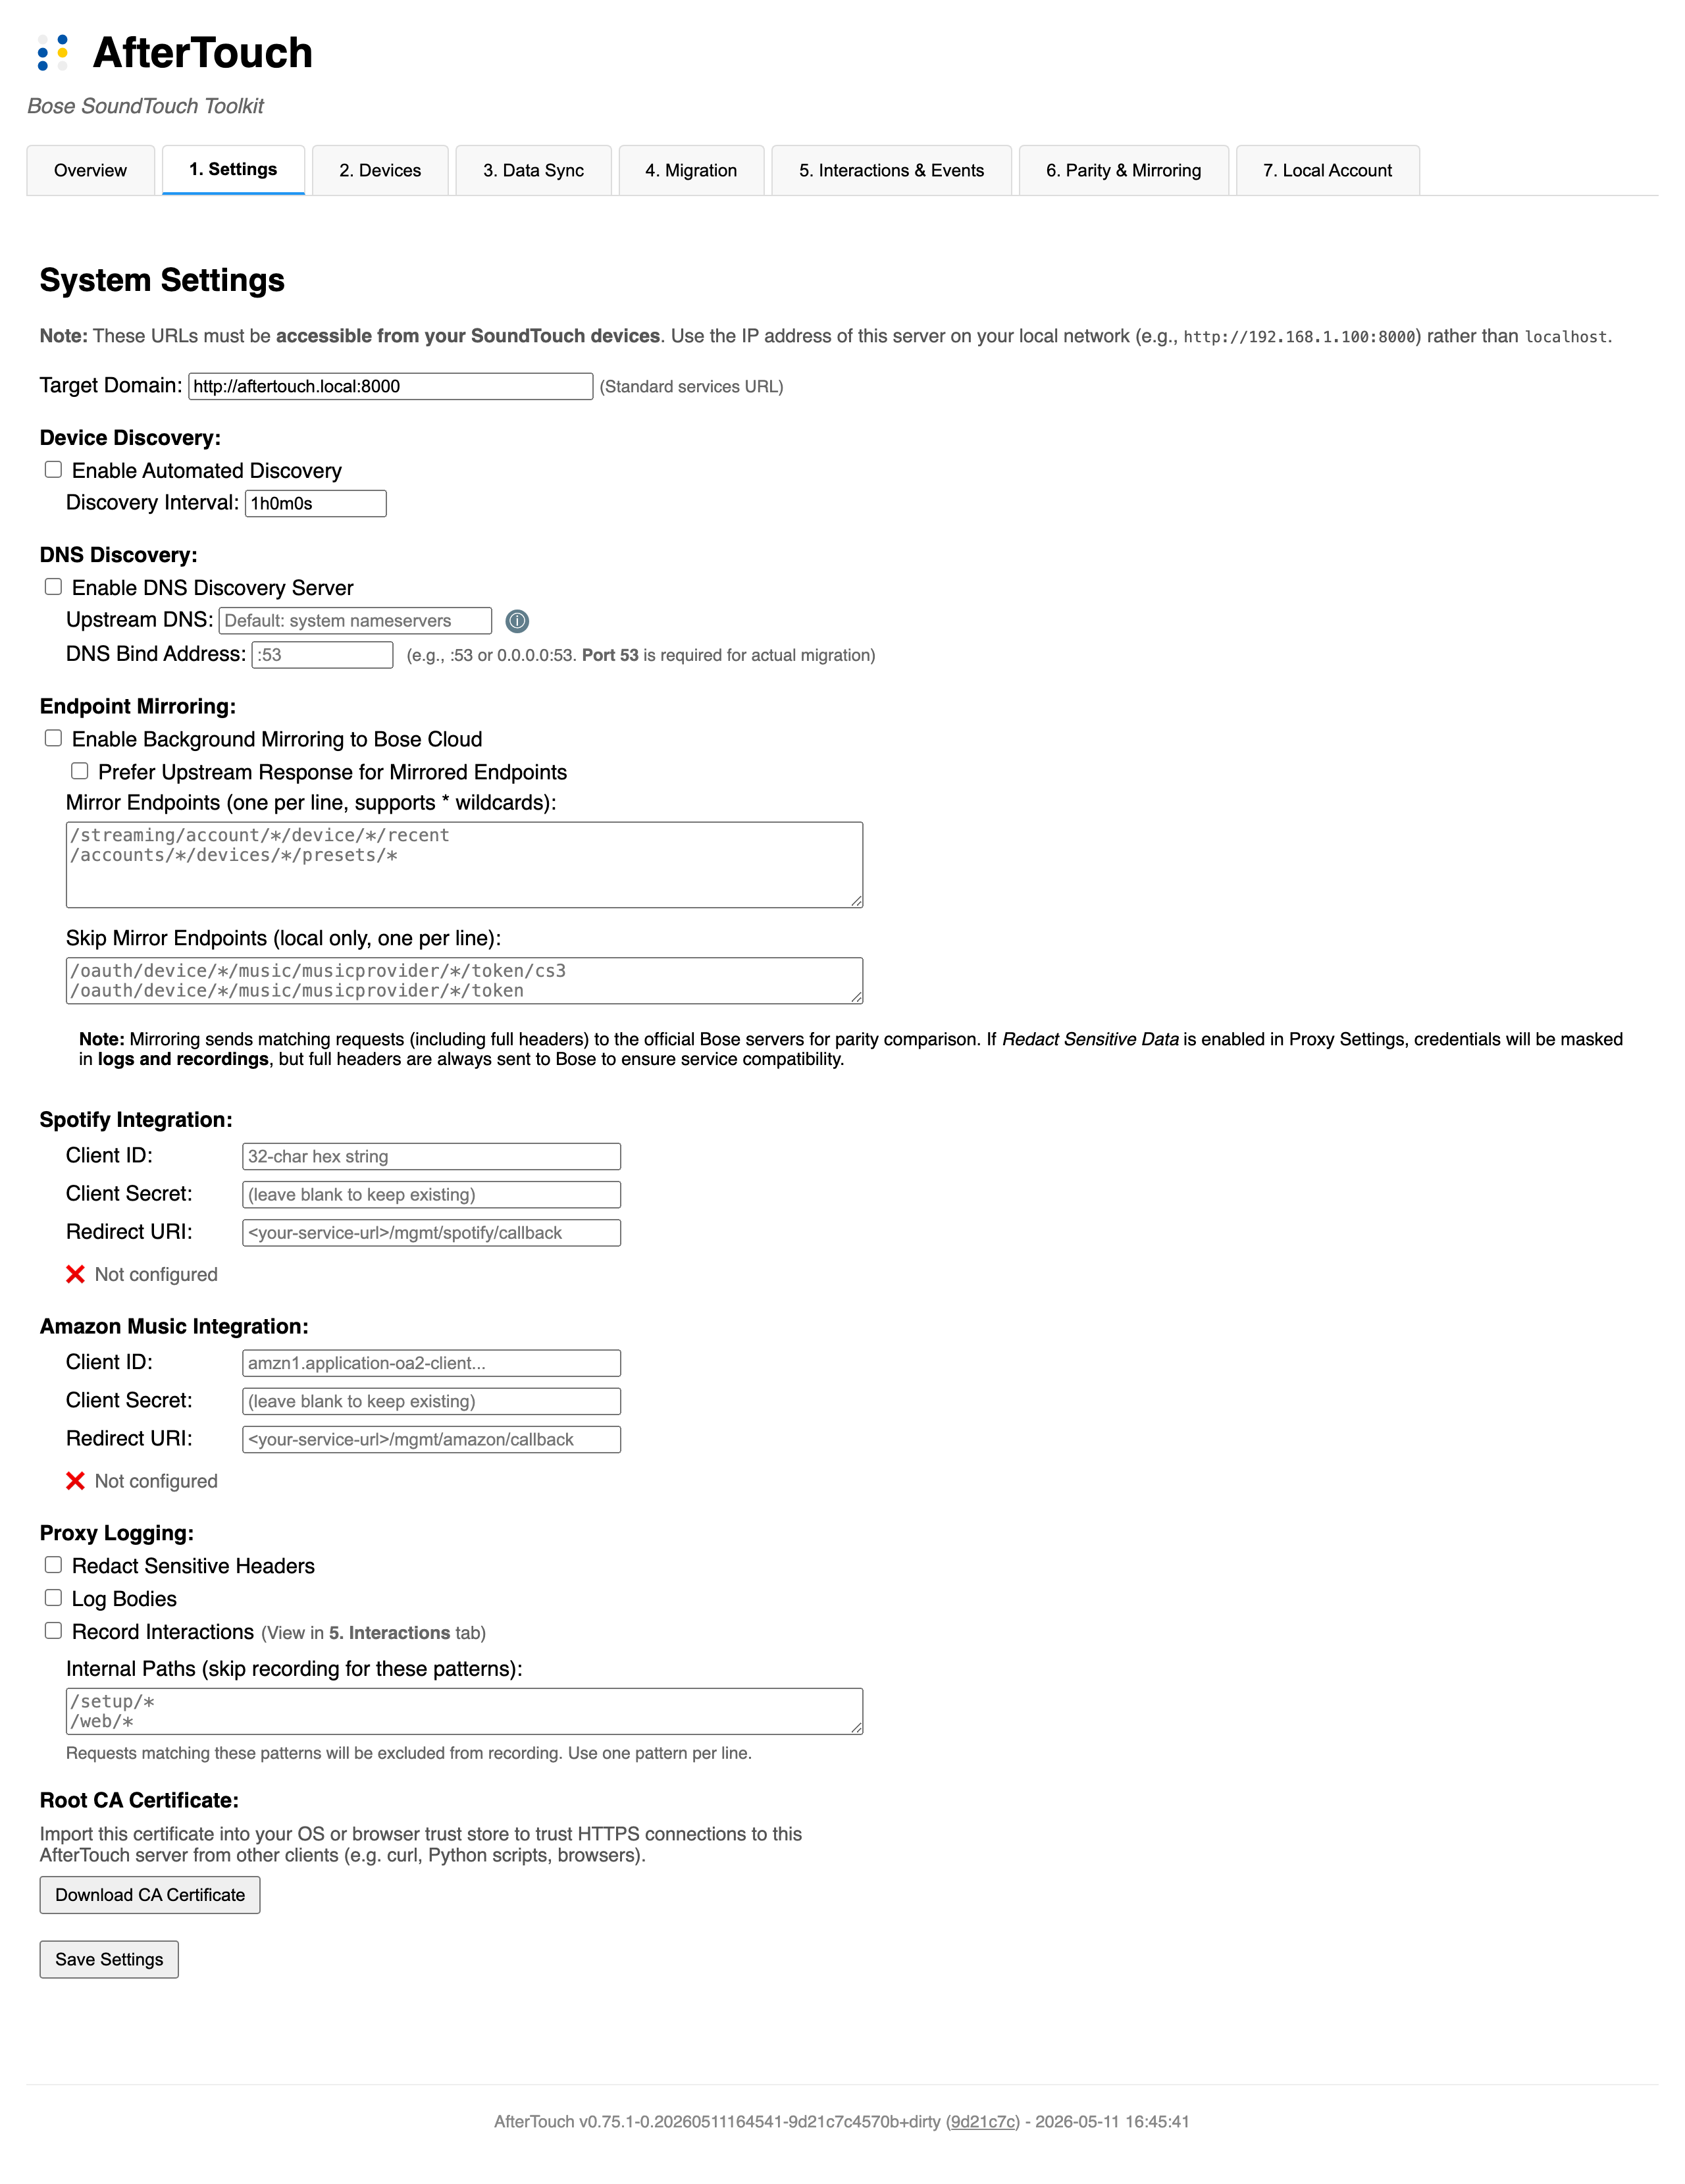
Set the Target Domain to the address your speakers can reach — for example https://soundtouch.fritz.box or http://192.0.2.100:8000. This must be the host’s address on your local network, not localhost.
Changing this later? Saving Settings only updates AfterTouch’s own record of its address — it does not reach out to any already-migrated speaker. Each speaker only learns a new address when you (re-)run Migrate for it (Step 5 below), regardless of migration method. If you change Target Domain after some speakers are already migrated, re-migrate each of them too, or they’ll keep using whatever address they were originally migrated with. See Troubleshooting: Changing Target Domain doesn’t change what a speaker actually uses.
On-device install: this “not
localhost” rule is for the local-network-host and cloud/VPS scenarios above, where the service runs on a different machine than the speaker. If you’re running AfterTouch directly on the speaker itself (see the On-Device Install Walkthrough), the speaker and the service are the same machine —http://localhost:8000is exactly right there, and is the recommended value: it needs no DNS/mDNS to resolve and survives DHCP address changes since it never depends on the LAN address at all. Installs built after issue #546’s fix set this automatically (viaDEPLOYMENT_MODE=on-device); on older installs, or if the field still shows the speaker’s own unresolvable Linux hostname (e.g.http://spotty:8000), set it here by hand.
If you plan to use DNS/DHCP redirect, enable the DNS Discovery Server and set the DNS Bind Address to :53. The upstream DNS should be your router’s IP, not the service’s own address.
Tip: If you change settings and they don’t seem to take effect, check
data/settings.json— settings saved in the UI take precedence over environment variables.
Step 3: Enable shell access on each speaker
The wizard supports two transports for talking to the speaker. Pick whichever your device exposes:
SSH (recommended — required for XML migration, DNS interception, and CA install)
The XML migration writes updated configuration to the speaker’s filesystem, which requires SSH access. Enable it once per device:
- Format a USB drive as FAT (FAT32). Some speakers require the bootable flag to be set on the partition — see SoundCork issue #172 for details.
- Create an empty file named
remote_services(no extension) in the root of the drive. - Insert the drive into the speaker’s USB port while it is powered on.
- Power-cycle the speaker (unplug the power cable, wait 10 seconds, reconnect).
- After boot, root SSH is available with no password:
ssh -oHostKeyAlgorithms=+ssh-rsa root@<SPEAKER-IP>
Or, without a USB stick: soundtouch-cli setup enable-ssh (#471) bootstraps SSH purely over the network, using the speaker’s telnet:17000 diagnostic shell (open by default on most firmware) to inject the SSH-enable command:
soundtouch-cli --host <SPEAKER-IP> setup enable-sshIt waits for :22 to come up and persists the change (survives a reboot) by default. Falls back to the USB-stick method above if telnet:17000 is closed or the injection doesn’t take on your model.
You only need to do this once per speaker. SSH can remain enabled for future maintenance or be disabled after migration — your choice.
To disable SSH after migration:
- USB stick only (no persistent file written): remove the stick and reboot the speaker — SSH will not be available after the next boot.
- Persistent
remote_servicesfile (written automatically during XML migration): remove it via the admin UI → Migrate tab → Disable SSH (Remove remote_services) button, then reboot. Or via the CLI:Then reboot the speaker for the change to take effect.soundtouch-cli --host <SPEAKER-IP> setup remote-services --remove
Telnet:17000 (fallback when SSH isn’t possible)
If the USB-stick unlock doesn’t work on your speaker (some firmware revisions refuse it — notably SA-5, ST520, and recent ST Portables), the wizard falls back to the speaker’s built-in diagnostic shell on TCP port 17000. No setup required — most SoundTouch firmware exposes it automatically. The wizard detects which transports are available and picks the right one; you don’t have to choose manually.
Telnet-only migrations are limited to HTTP (no CA install possible without SSH). The wizard surfaces this clearly when it applies.
Step 4: Add and sync your speaker
Discover
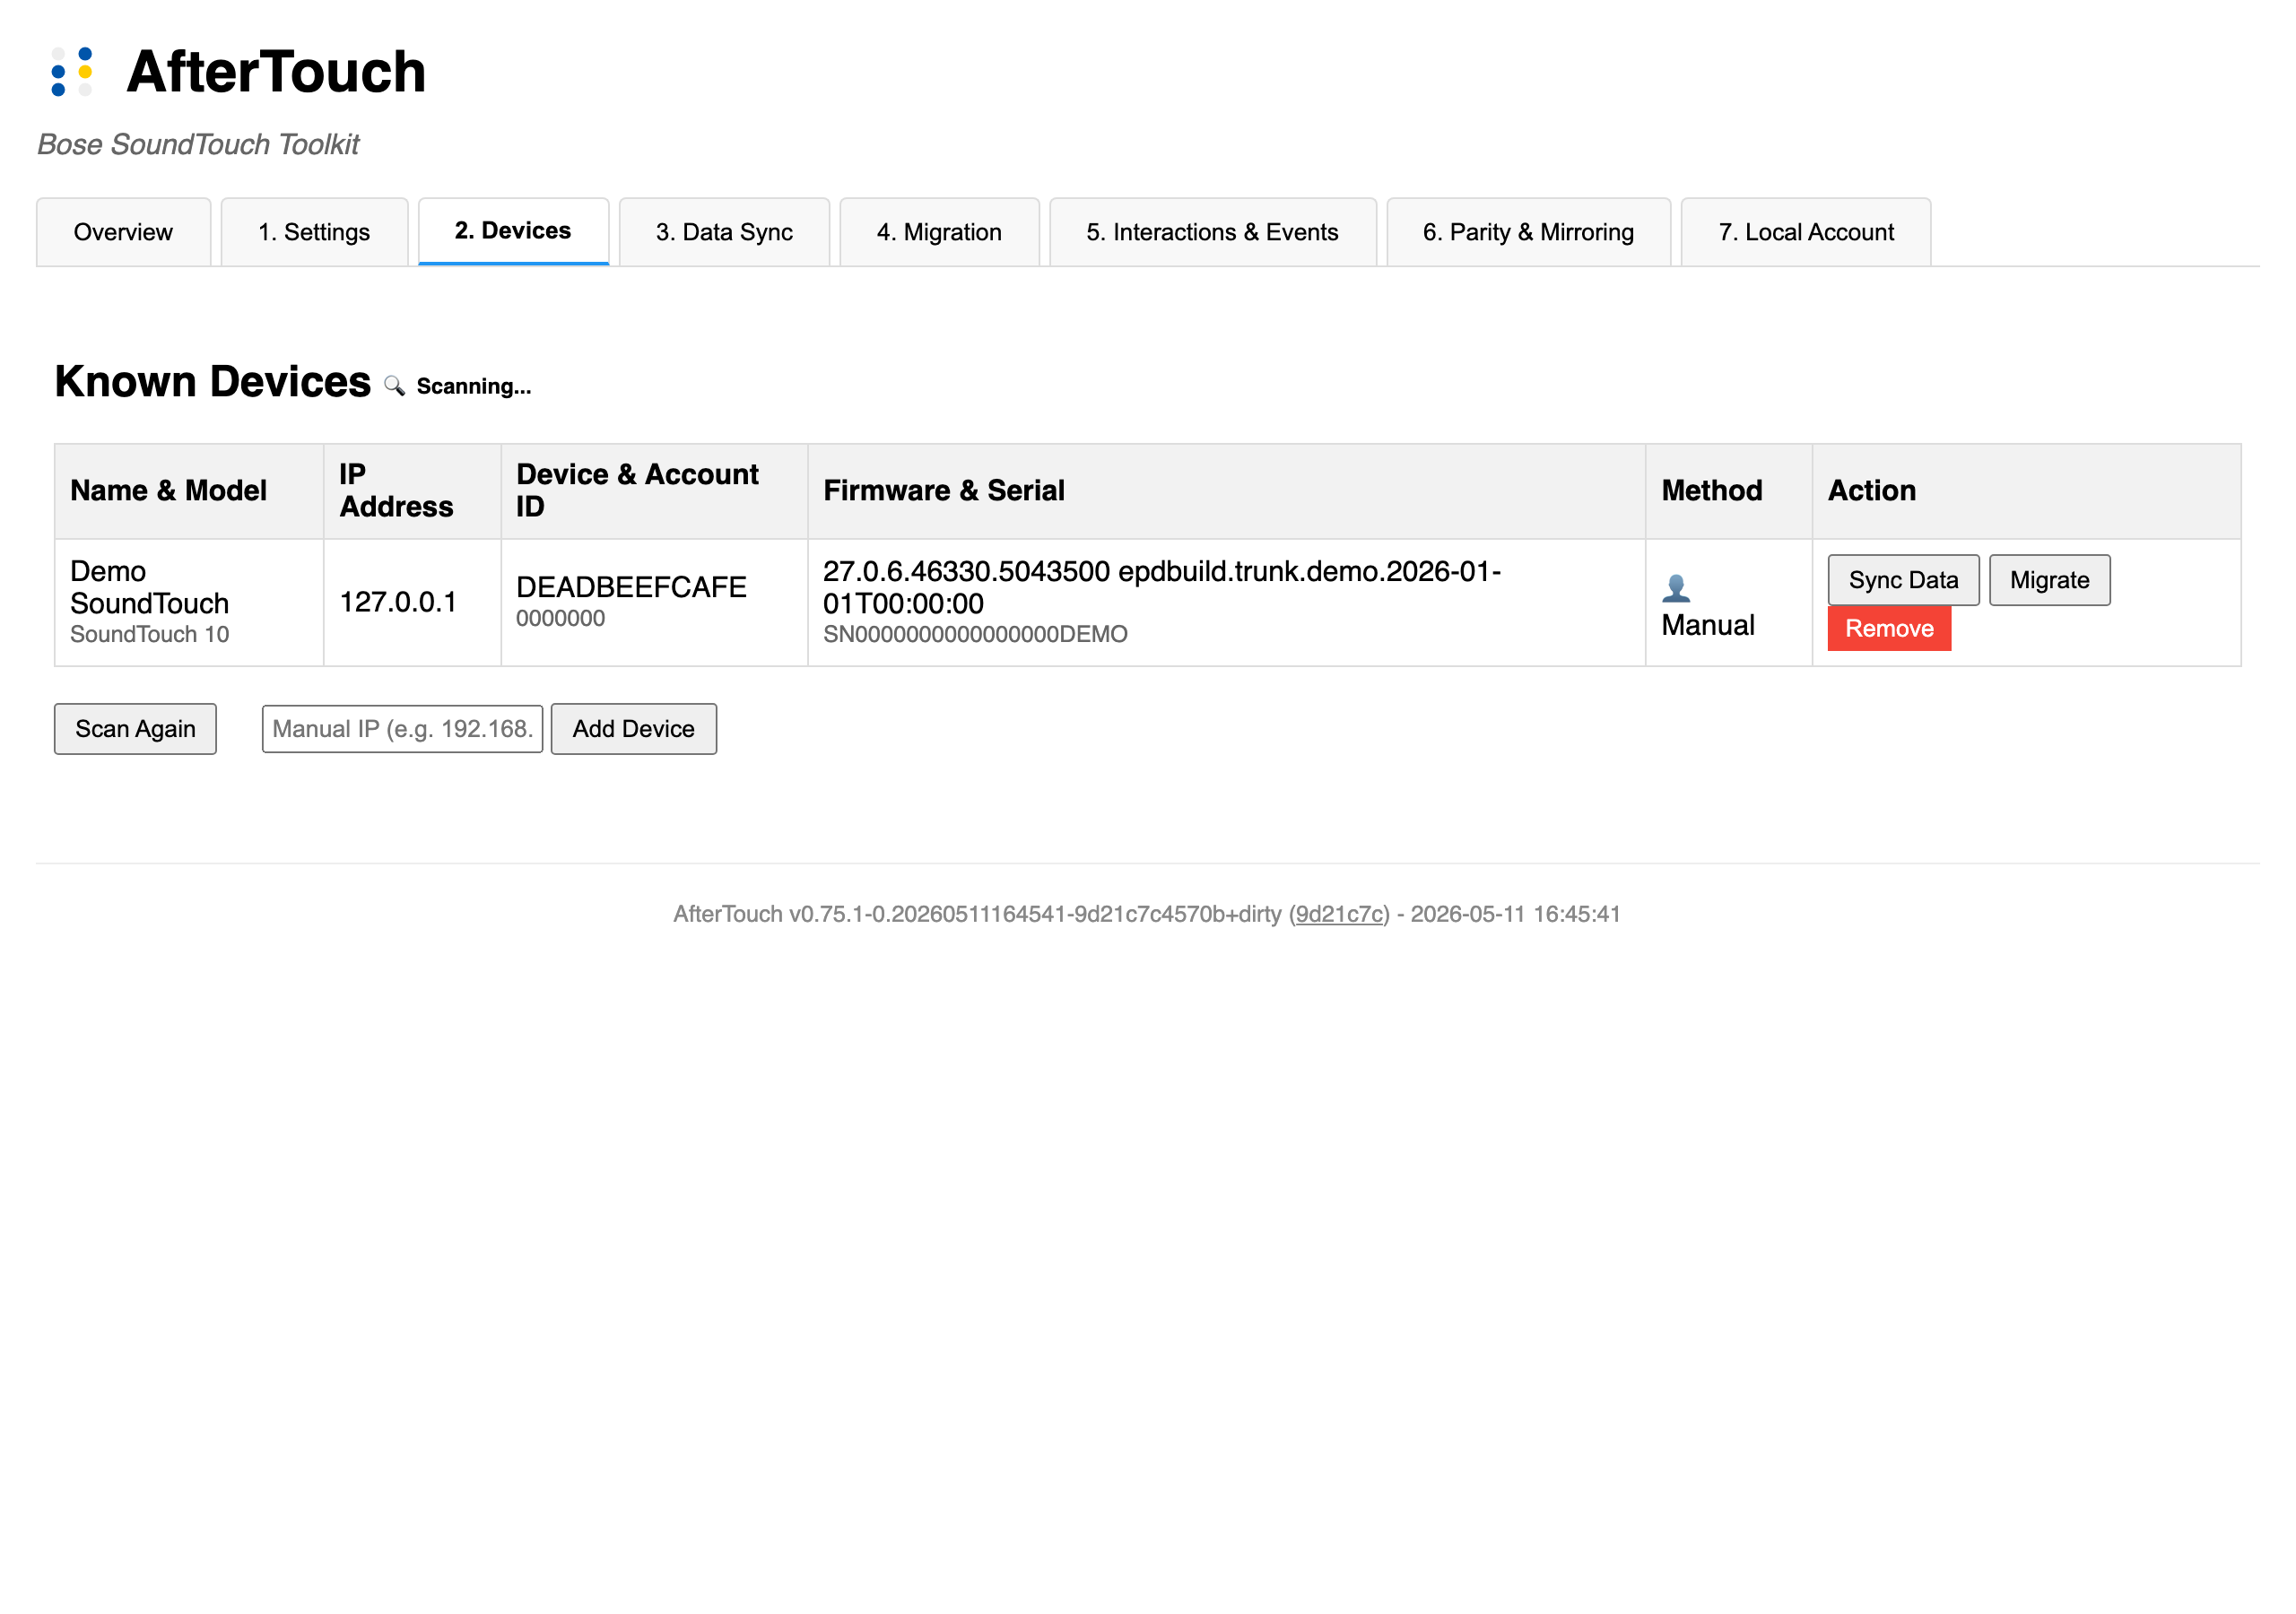
The service scans for SoundTouch devices automatically every few minutes. Check the Devices tab in the web UI. If your speaker doesn’t appear, click Scan Again to trigger an immediate scan, or enter the IP address manually and click Add Device.
Sync
Once the speaker appears, click Sync Data. This connects to the speaker and pulls its current presets, recently played items, and configured sources into the local service’s datastore. It also creates an off-device backup of the speaker’s configuration.
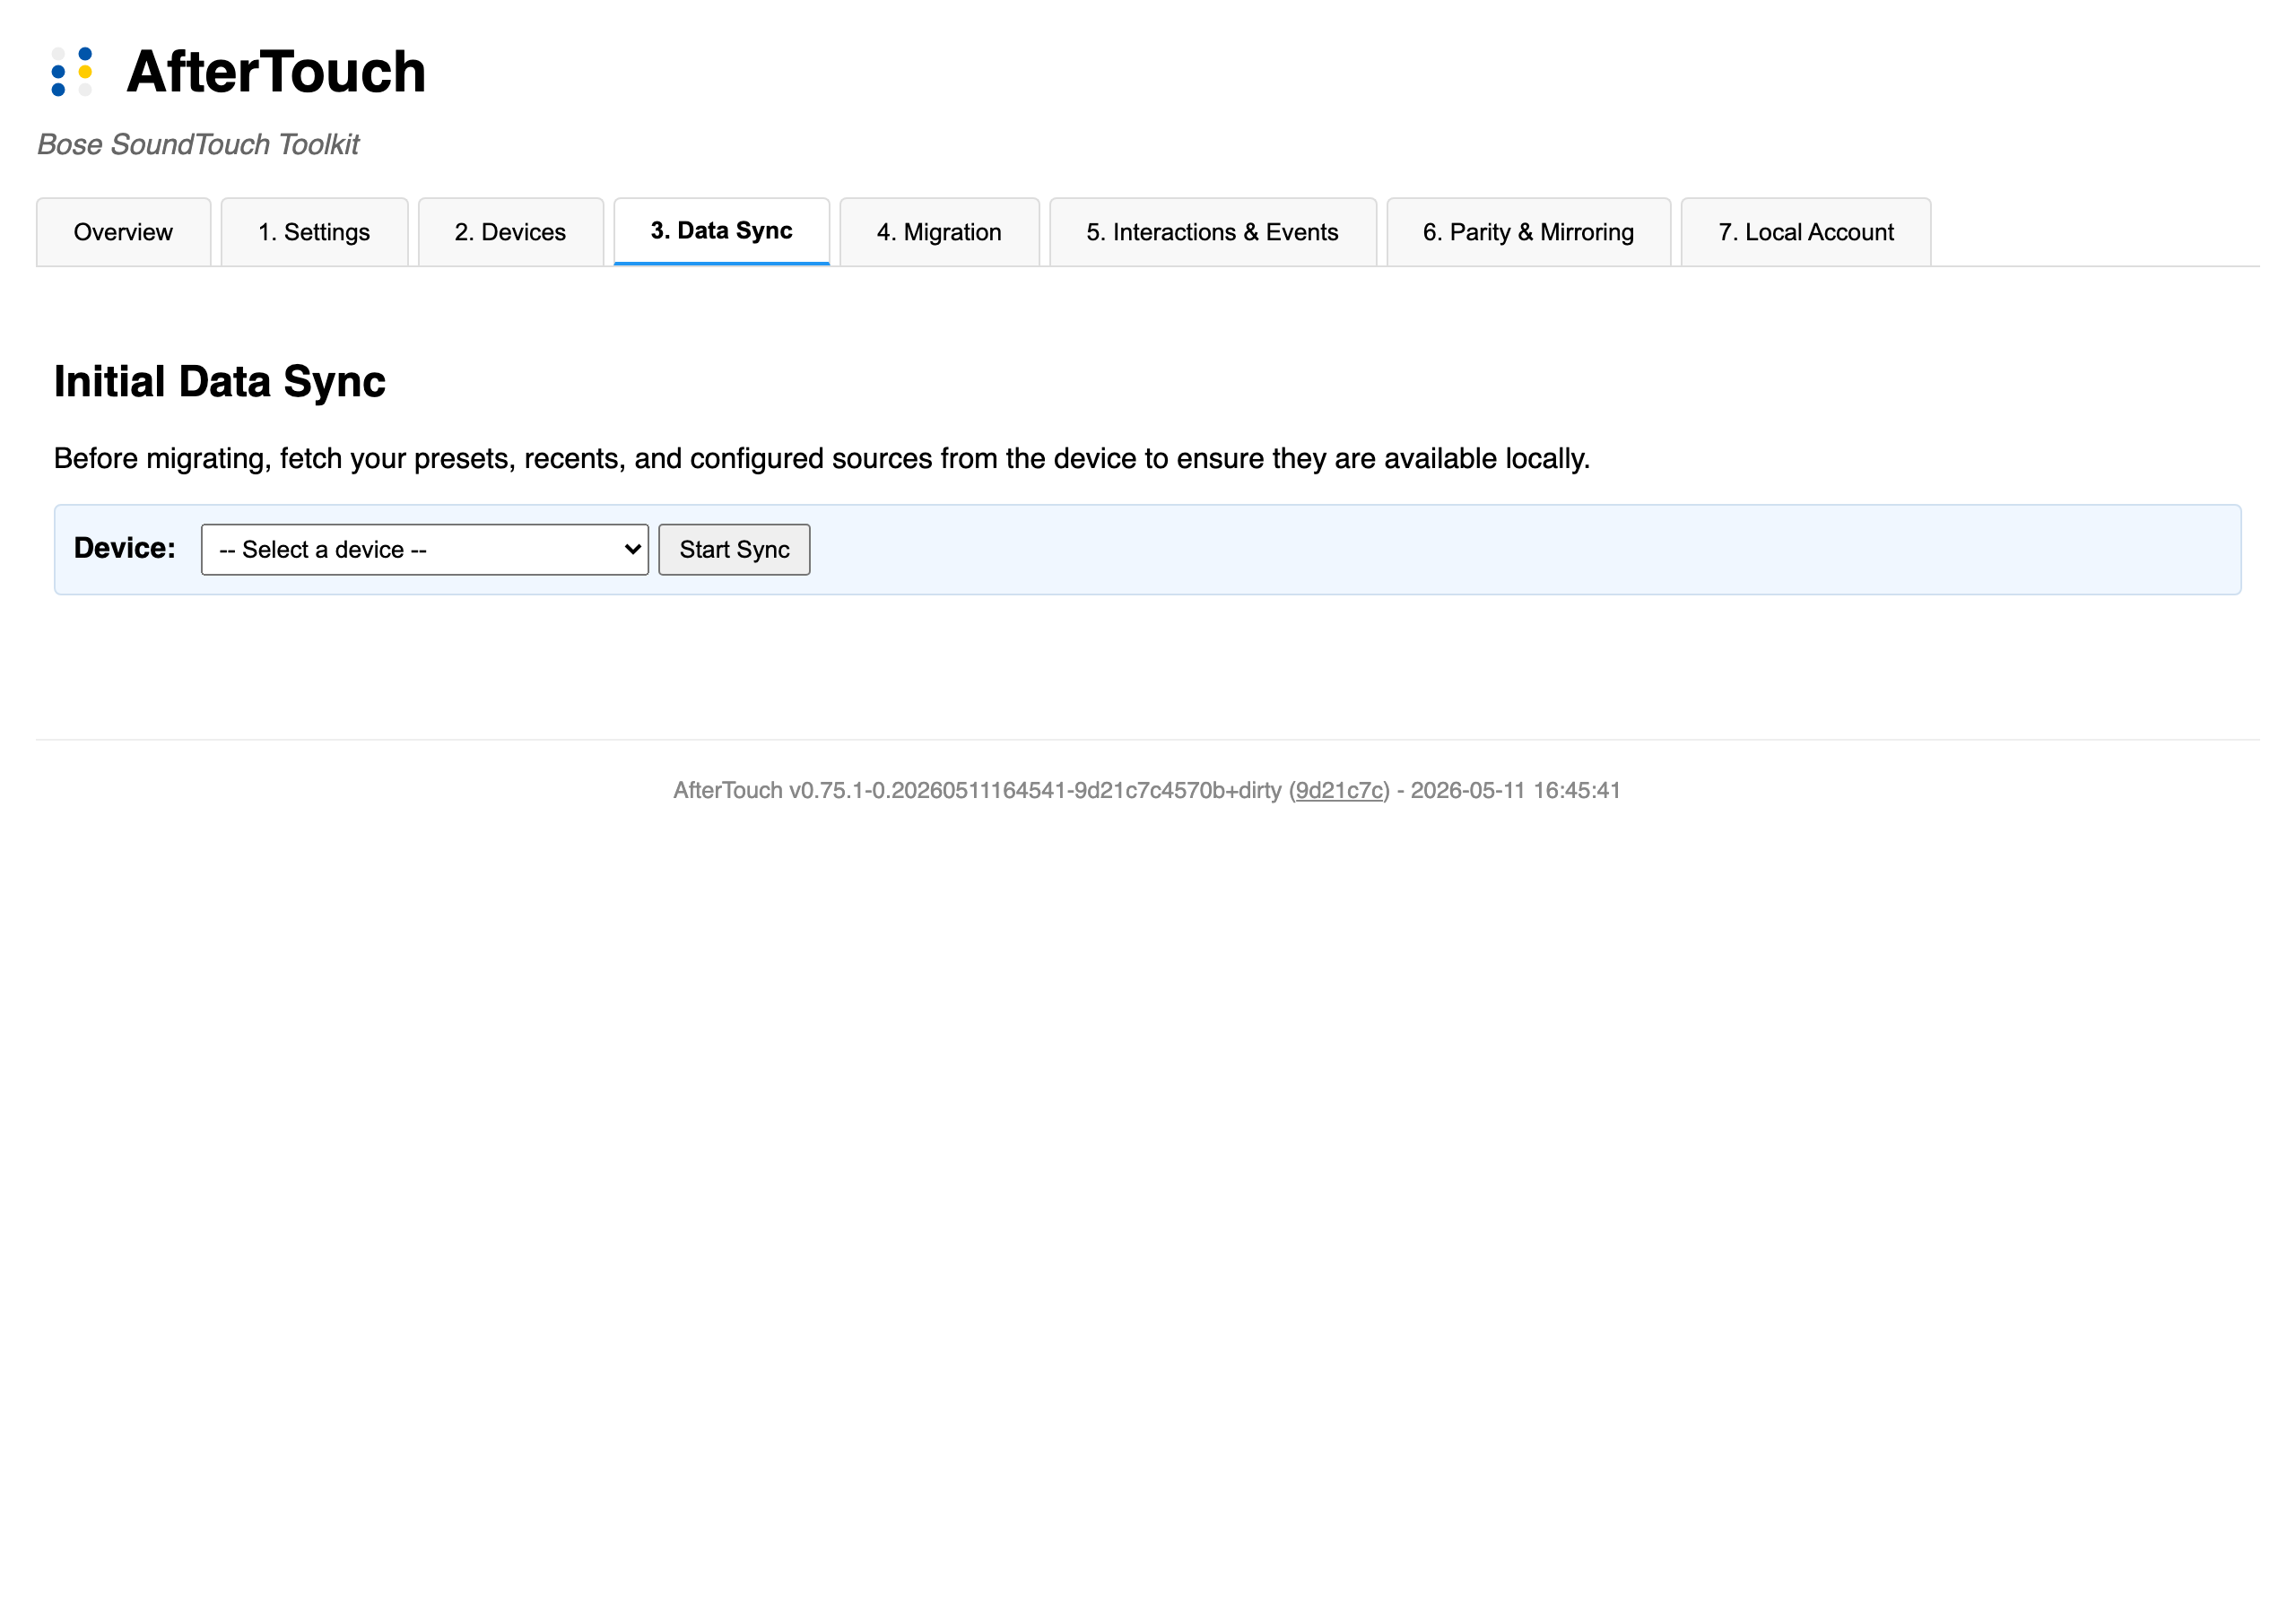
Sync pulls the speaker’s local state into AfterTouch’s datastore, creating an off-device backup of its configuration. If you ran this before May 6, 2026, your account data from Bose’s servers was also captured at that time.
Migration is refused until the service has a valid snapshot for that exact account and device and verifies that its rendered account data preserves every live preset slot. If the migration page asks for Data Sync, sync the device and retry instead of bypassing the check.
If the account already contains other devices, migration proceeds but the log
says so. Some speaker firmware has been reported to wipe its presets after a
reboot-triggered resync of a shared account even when /full contains the
correct data (see issue #614, where the root cause is still open). One account
holding every speaker in the household is the normal arrangement, so this is a
warning rather than a refusal; if you do hit the preset wipe, moving that
speaker to a dedicated account and running Data Sync for it is the known
workaround.
Step 5: Migrate
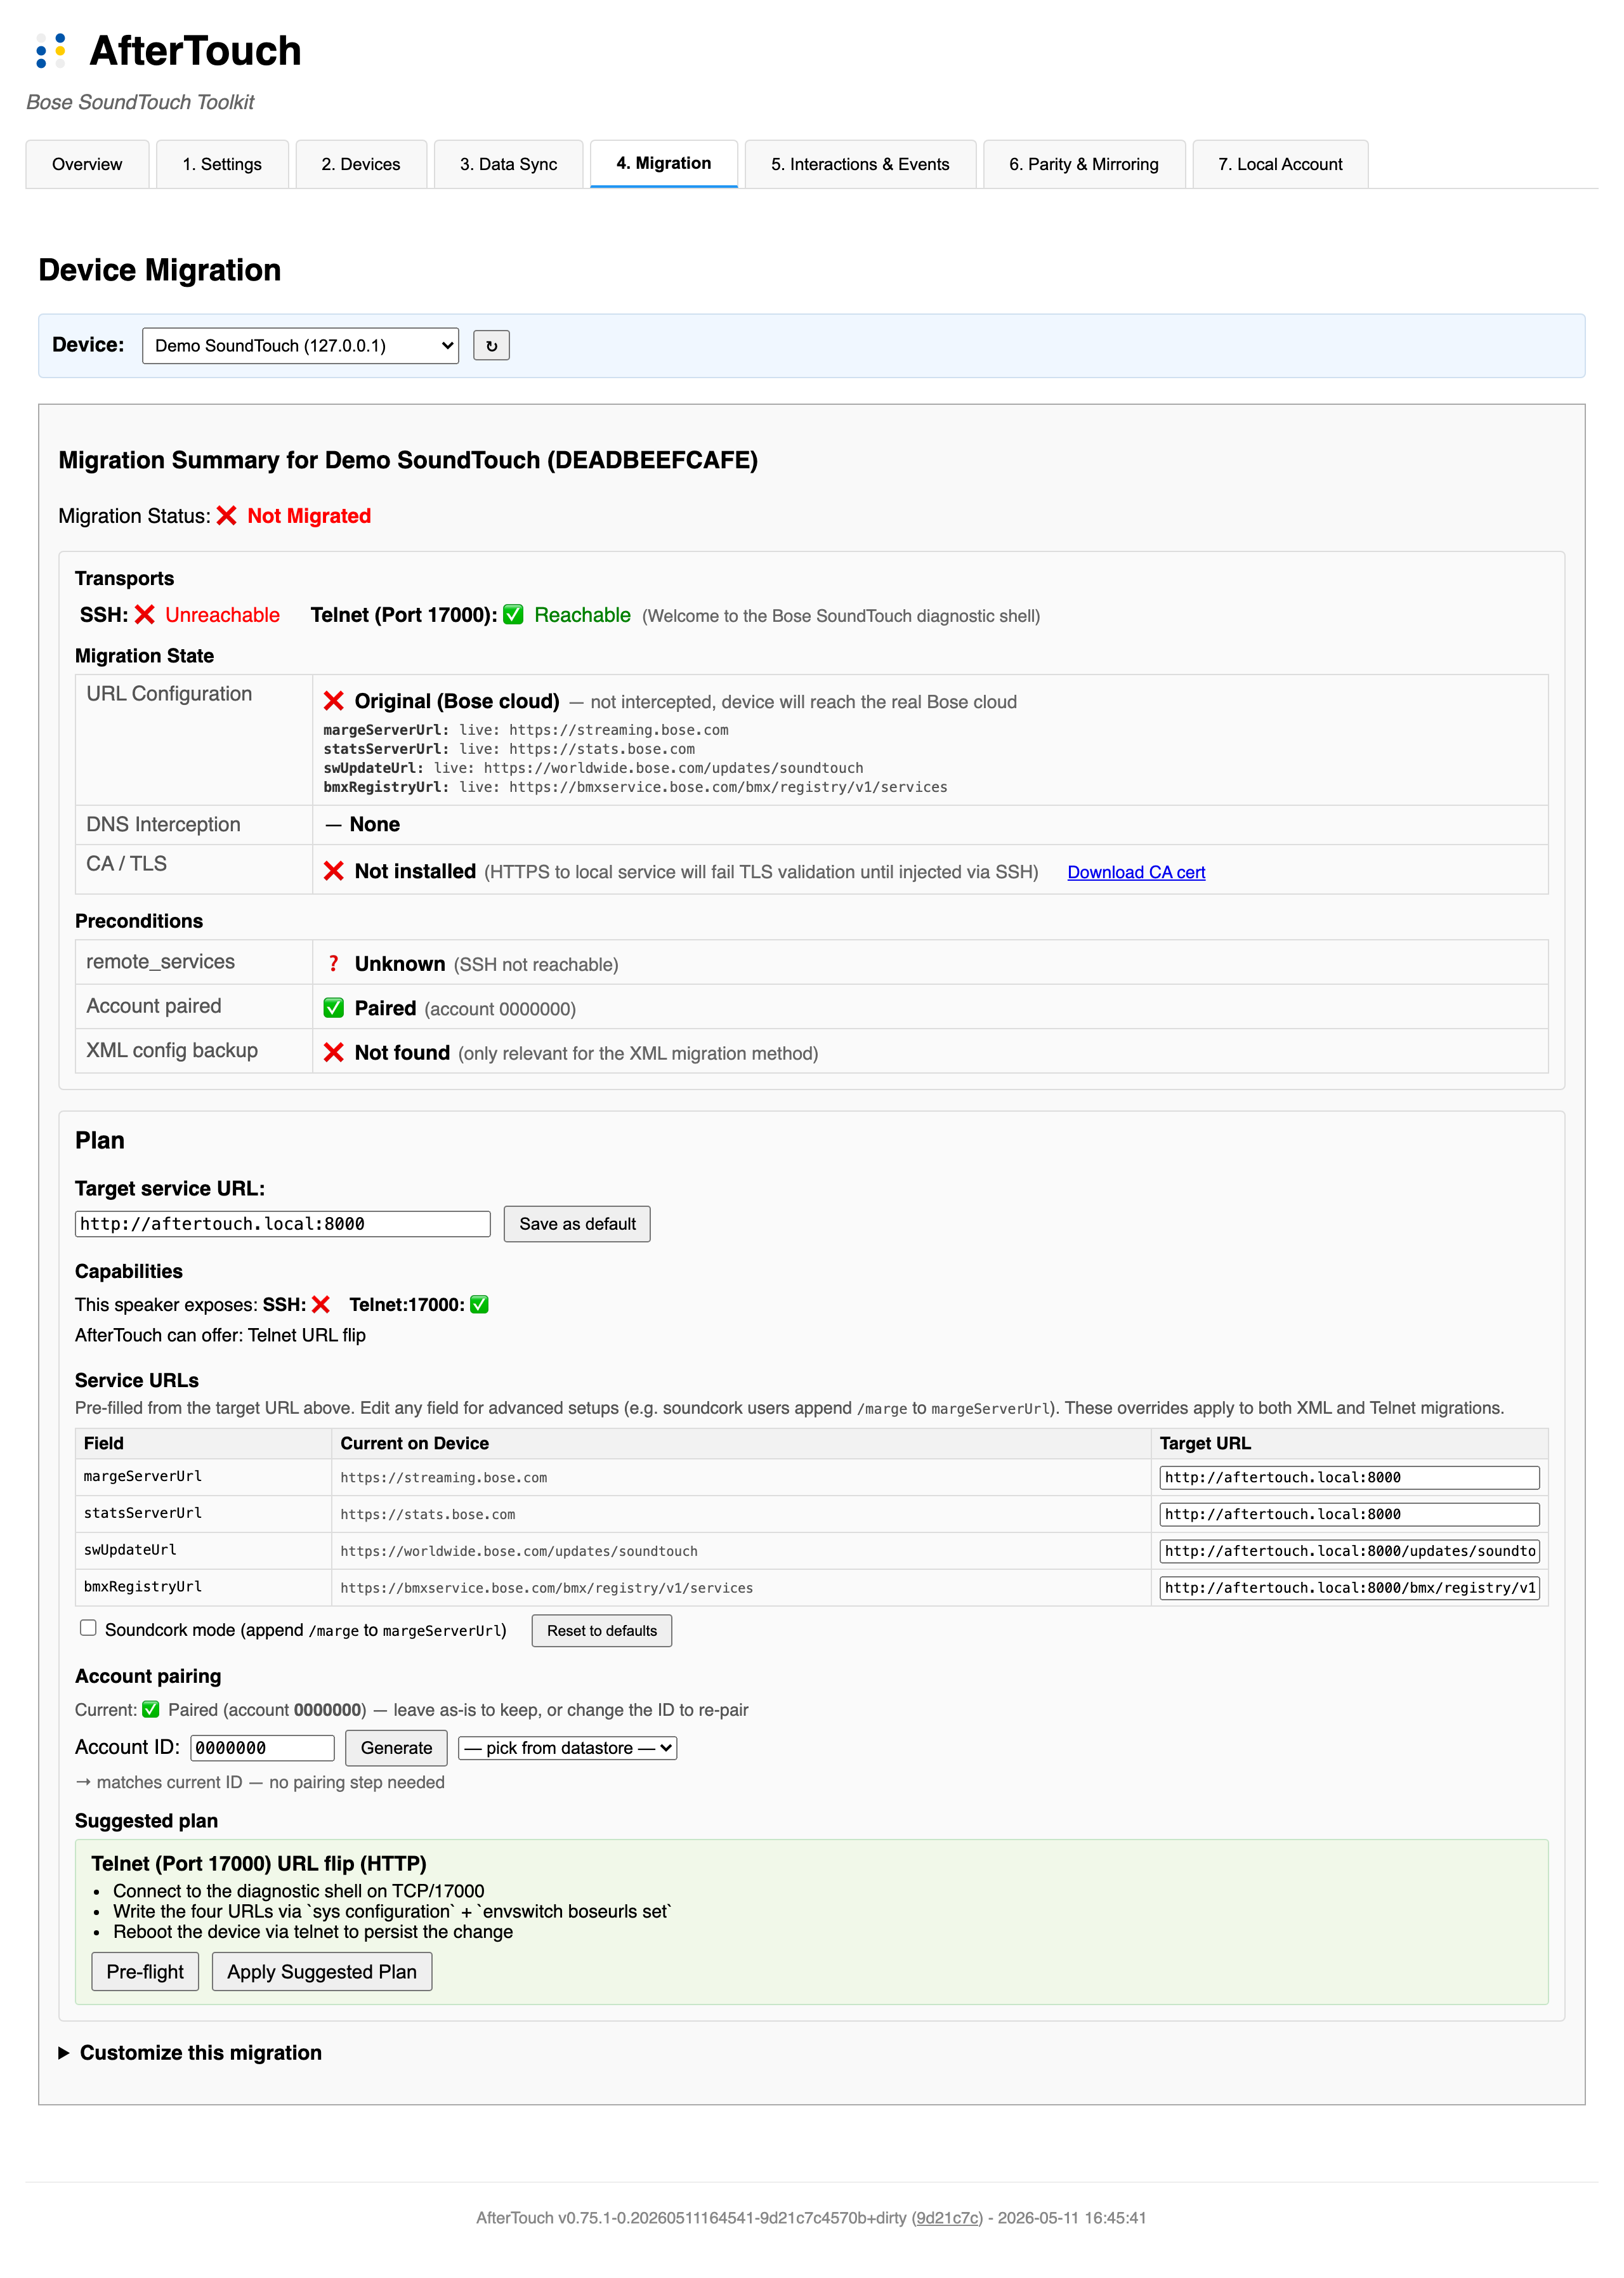
Click Migrate next to a device on the Devices tab to open the Migration tab. The tab opens with a Migration Summary that shows where your speaker currently stands, then offers a one-click suggested plan and a fully customizable form underneath.
What you see at the top — the state card
Three rows tell you the speaker’s current state at a glance:
- Transports — whether SSH and Telnet:17000 are reachable. The wizard’s choices are driven by these.
- Migration State — three orthogonal axes:
- URL Configuration — original Bose URLs or AfterTouch URLs (with a special “intercepted via DNS” verdict when the resolv.conf hook is doing the redirect).
- DNS Interception — none, or
/etc/resolv.confhook active. - CA / TLS — local root CA installed on the device, with
Trust CA NowandDownload CA certactions inline.
- Preconditions —
remote_servicespersistence, account pairing state, and XML config backup presence.
The Plan card — the happy path
Below the state card is the Plan card. For most users this is the only thing you’ll touch:
- Target service URL — pre-filled from your Settings. Edit inline and click Save as default to update Settings without bouncing tabs.
- Capabilities — what transports the speaker exposes and what AfterTouch can offer given those.
- Service URLs — four URL inputs (margeServerUrl, statsServerUrl, swUpdateUrl, bmxRegistryUrl) pre-filled with canonical defaults. Most users leave them as-is; soundcork users tick the Soundcork mode checkbox to append
/margetomargeServerUrl. URL validation runs on every keystroke. - Account pairing — pre-filled with the speaker’s current account ID. Leave it to keep the existing pairing, change it to re-pair, or click Generate to assign a new 7-digit ID on a factory-reset device.
- Suggested plan — one big green button: Apply Suggested Plan. The wizard picks the most conservative recipe for your speaker (XML over SSH with HTTP when SSH works; telnet URL flip with HTTP when only telnet works) and runs it.
What happens when you click Apply
The wizard switches to a visible Pre-flight checks panel and runs every applicable verification before touching the speaker:
- Backend summary re-check — confirms transports, hostname resolution, and that the URLs you plan to write match what the backend would produce.
- HTTPS connection from device (SSH-capable speakers) — uploads a temporary CA and runs
curlfrom the speaker to your service. - Reachability check (passive observer) (already-migrated speakers) — nudges
:8090/swUpdateCheckon the device and watches for any request from the speaker to land on the service. Used when the speaker is already migrated and the service is the natural target of its outbounds. - “Round-trip validation runs after Apply + reboot” (not-yet-migrated speakers) — surfaced as a skip row with a rationale. The speaker’s swUpdate daemon caches its URL at boot, so there is no useful no-reboot round-trip check pre-migration; the canonical telnet flow is Apply → reboot → re-run pre-flight on the migrated speaker.
- DNS redirection from device — when DNS interception is part of the plan.
On all-green, the wizard auto-proceeds. On any failure, it pauses with Proceed Anyway / Cancel buttons so you can override on a known-false-positive (slow DNS, etc.) or fix the underlying issue and retry.
Customize this migration — for mix-and-match
Expand the ▸ Customize this migration section to pick any combination of three independent axes:
- URL flip transport — XML over SSH / Telnet (Port 17000) / Skip
- DNS interception — None /
/etc/resolv.confhook - Local CA install — checkbox (SSH-only)
Each option carries a per-axis availability hint (e.g. (SSH unreachable), (already trusted)) so you see why an option is disabled before you pick. Apply Custom Plan runs the chosen combination as a sequence; the same pre-flight panel gates the execution.
Note: DNS interception bundles the CA install on the backend, so a standalone CA-install step is skipped automatically when DNS is part of the plan. The wizard handles this for you.
Step 6: Reboot and verify
After a successful Apply the wizard auto-expands the Customize section and highlights the Reboot Speaker button. Click it (or power-cycle the speaker manually) to apply all configuration changes. The reboot transport is picked automatically from your URL flip choice — telnet reboot for SSH-less speakers, SSH reboot otherwise.
After reboot:
- The speaker should appear as migrated in the Devices tab
- The state card on the Migration tab should now show ✅ for URL Configuration (or “intercepted via DNS” if you used the resolv.conf hook)
- Presets should load and play (served from the local service)
- TuneIn browsing should work
- Recently played items should appear
If something doesn’t work, check the Interactions tab in the web UI for failed requests, and the Troubleshooting section in the SoundTouch Service Guide.
Repeat for each speaker
Each speaker is migrated independently. You can run multiple migrations in parallel, but migrating one at a time makes it easier to diagnose issues.
Alternative: CLI-driven factory-reset workflow
If you prefer scripting the migration, or the wizard isn’t an option (headless server, automation, batch onboarding of many speakers), soundtouch-cli exposes the same building blocks. The flow below is not an in-place migration — it factory-resets the speaker and brings it up fresh against AfterTouch, so any data Bose preserved on the device is wiped. Use this when:
- You’re starting from a factory-reset speaker anyway.
- The wizard’s in-place migration didn’t take and you want a clean slate.
- You’re scripting setup for many speakers and want a reproducible recipe.
Prerequisites
- AfterTouch service running and reachable at a stable URL (e.g.,
https://soundtouch.localfrom your.env). - The speaker reachable on its current IP (passed as
--host). - For the AP-mode handover step, your laptop must be able to join the speaker’s
Bose SoundTouchWi-Fi (you’ll switch between home Wi-Fi and the speaker’s AP).
The full sequence
# 1. Plan what the reset+pair pipeline will write (dry run, no changes yet).
soundtouch-cli --host 192.0.2.50 setup plan \
  --reset=true --include-pair=false \
  --service-url='https://soundtouch.local'

# 2. Trigger the factory reset. The speaker reboots into AP mode.
soundtouch-cli --host 192.0.2.50 setup factory-reset

# --- Manual step: join the speaker's Wi-Fi AP (SSID "Bose SoundTouch ...") ---

# 3. Wait for the AP-mode endpoint to answer.
soundtouch-cli setup wait-ap

# 4. Push your home Wi-Fi credentials to the speaker.
#    Run twice if the first attempt's ACK races the AP teardown — the second
#    one is a no-op if the first succeeded.
soundtouch-cli setup wifi-push --ssid="YourHomeSSID" --pass='your-wifi-password'

# --- Manual step: switch your laptop back to the home Wi-Fi network ---

# 5. Wait for the speaker to come back online on the home network.
#    --match takes the last 4-6 hex chars of the speaker's MAC (visible on
#    the bottom of the device).
soundtouch-cli setup wait-online --match=42CAFE

# 6. Pair the speaker with an AfterTouch account.
#    --mode=full runs the canonical WebSocket SETUP sequence (matches the
#    Bose app's flow); --account is the 7-digit account ID AfterTouch
#    should attach the speaker to.
soundtouch-cli --host 192.0.2.50 setup pair \
  --mode=full --account=1111111 \
  --service-url='https://soundtouch.local'
Verifying the result
After pairing completes:
- The speaker should appear on the Devices tab in the web UI.
- AUX should switch and play audio when selected.
- Pressing presets should fetch their content from AfterTouch (the
[LOG]rows on the service confirm). - TuneIn search and playback should work end-to-end.
If any of these fail post-pair, see Troubleshooting — most commonly the speaker just needs a power cycle to pick up everything cleanly.
Differences vs the wizard
| Aspect | Wizard (in-place migration) | CLI factory-reset workflow |
|---|---|---|
| Preserves speaker’s existing state | yes (Presets, recents, attached account) | no — wipes everything |
| Requires Wi-Fi-network switching | no | yes (laptop joins speaker AP, then home network) |
| Scriptable / reproducible | clickable, not scriptable | full bash recipe |
| Cloud-side data (Bose Marge backup) | preserved if Sync ran while cloud was alive | not relevant — fresh account on AfterTouch |
| Best for | “I want this speaker to keep working with what’s on it” | “I want a clean, reproducible setup against AfterTouch” |
The wizard is still the recommended path for a one-off migration of an existing setup. The CLI workflow is the right choice when you’re scripting, batching, or already starting from a reset.
Rollback
If you need to undo a migration:
- From the web UI: Use the Revert to Defaults action on the device — this restores the
.originalbackup files created on the speaker during the XML migration. - Telnet-only migrations: the wizard writes both the runtime configuration layer (
sys configuration …) and the persistent layer (envswitch boseurls set …) so the migration survives reboot. Use Restore Bose URLs via Telnet in the web UI or runsoundtouch-cli --host <device> setup revert --method telnet. This restores only the four canonical Bose URL fields; use the CLI URL override flags if your original firmware- or region-specific values differ. The web action is offered whenever the live telnet configuration contains a non-canonical URL, including a URL for an older AfterTouch backend. - Via SSH: The original XML config is backed up on the speaker with a
.originalsuffix. Restore it manually if the UI is unreachable. - Factory reset: As a last resort, perform a factory reset (see Device Initial Setup for button sequences). This wipes all configuration and returns the speaker to out-of-box state.
Post-migration
Once all speakers are migrated, the data/ directory is the source of truth for your presets, recents, and device state. Back it up periodically. The web UI at http://<server>:8000 is your management interface from this point on.
If you ran soundtouch-backup before the cloud shutdown, keep that archive in case you need to restore credentials or presets later.