SoundTouch Device Initial Setup Variants
Based on community research from the SoundCork and ÜberBöse API projects, as well as analysis of the Stockholm firmware (firmware/Stockholm/.../setup/), this document outlines the methods used for the “out-of-the-box” setup of SoundTouch devices.
Setup Overview
Initial setup is the process of connecting a new or factory-reset device to a local Wi-Fi network and a Bose (or custom) account. This is distinct from the “Migration” process (handled by soundtouch-service), which redirects an already-configured device to a new server.
1. Bluetooth Low Energy (BLE) Setup
Used by most modern SoundTouch devices (ST-10, ST-20/30 Series III, SoundTouch 300).
- Mechanism: The SoundTouch app communicates with the device over BLE to exchange Wi-Fi credentials.
- Protocol: Internal research refers to this as the Gabbo protocol (see
gabbo_setup_bco.jsin firmware). - Process:
- Put the device in setup mode (usually by holding the ‘2’ and ‘-’ buttons).
- The app discovers the device via BLE.
- The app sends the Wi-Fi SSID and Password to the device.
- The device connects to Wi-Fi and disables BLE setup.
2. Access Point (AP) Mode / Web Setup
The classic “failover” or “alternate” setup method.
- Mechanism: The device creates its own Wi-Fi network (SSID:
Bose SoundTouch ...orBose Home Speaker ...). - IP Address: Typically
192.0.2.1(device-side, verified on ST10). - Web Interface: The device hosts a web server on port 80.
- Process:
- Connect a PC/Phone to the device’s Wi-Fi.
- Open a browser to
http://192.0.2.1. - The device serves a Wi-Fi setup form — enter your home network SSID and password and click Submit.
- The device disconnects from AP mode and joins your home network within ~15–30 seconds.
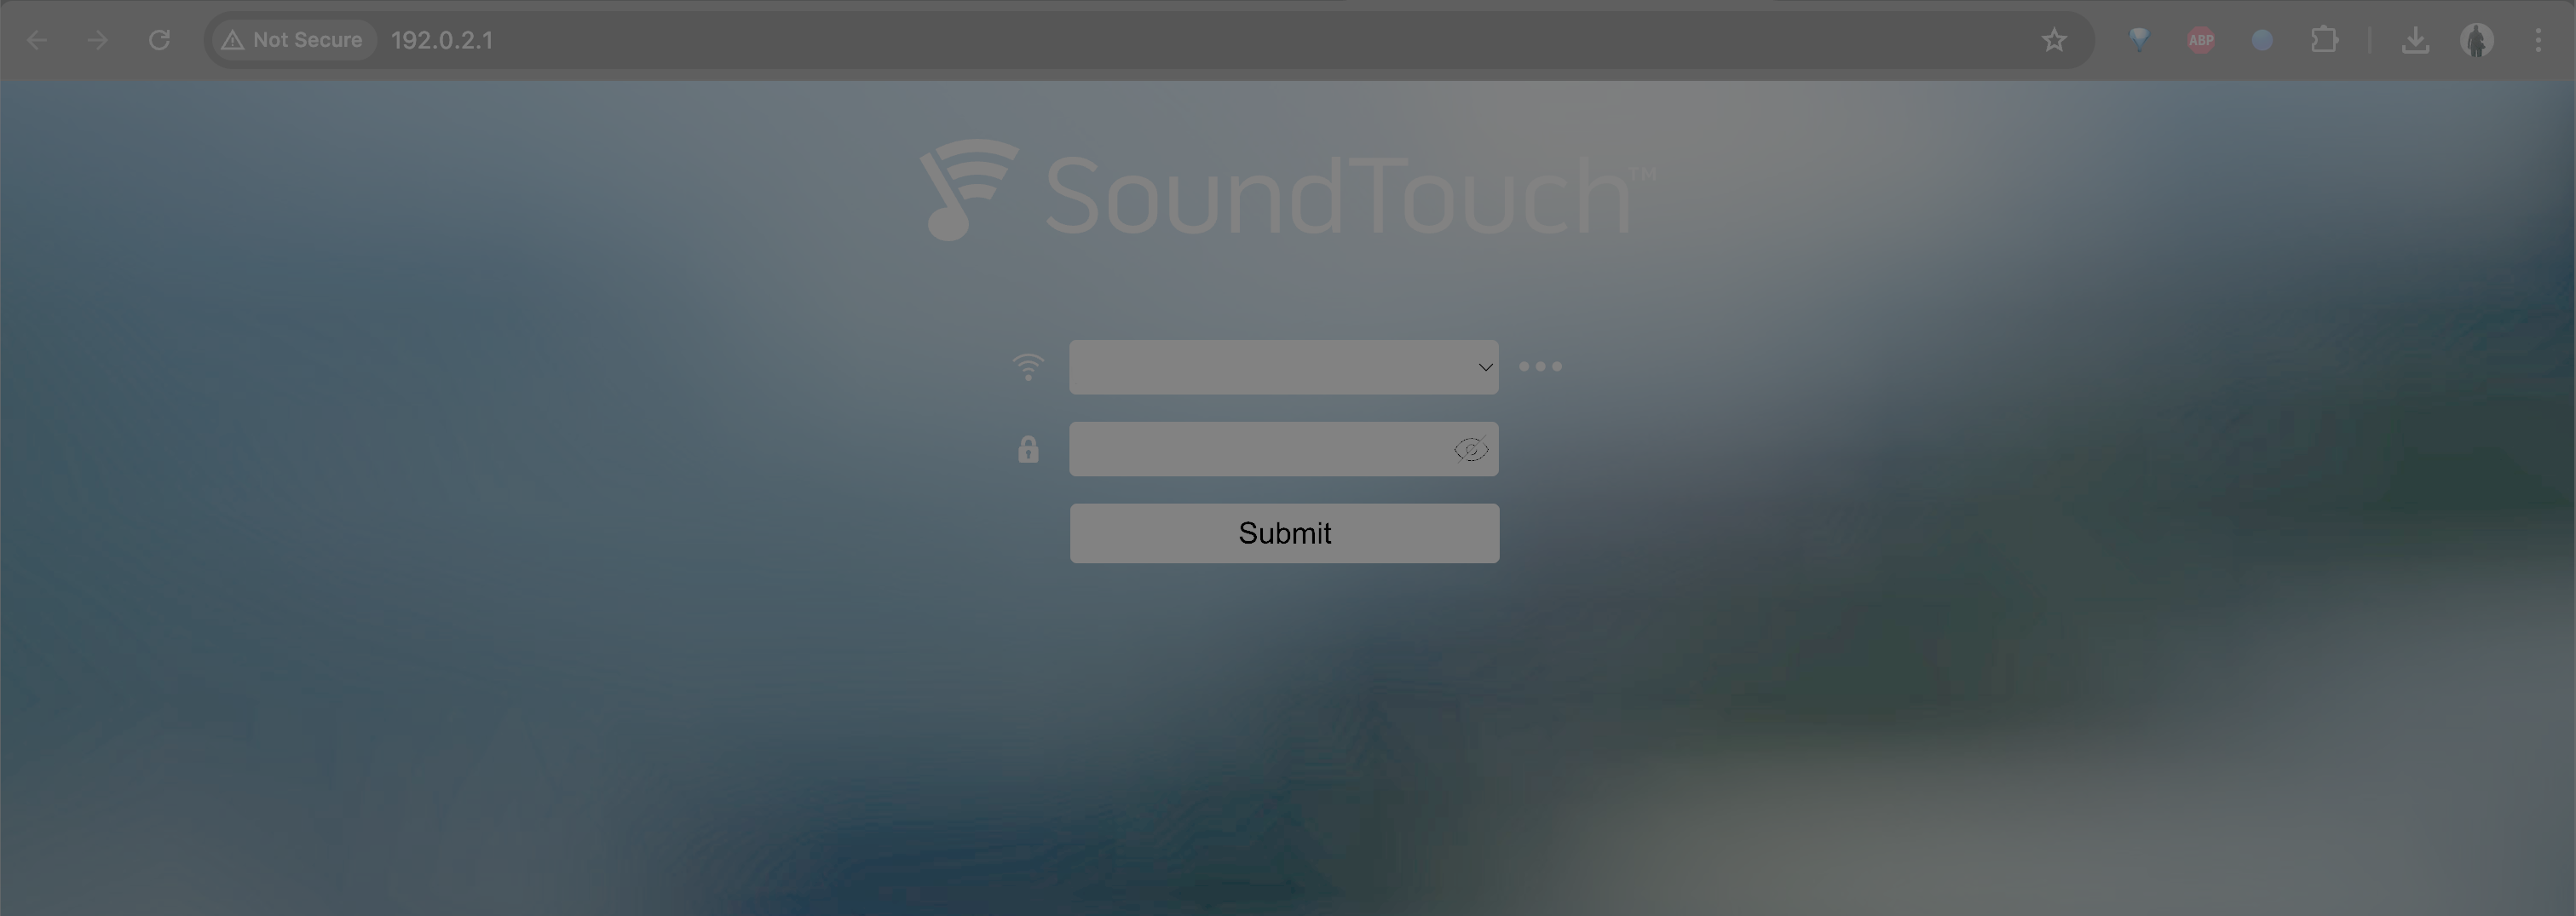
For command-line provisioning (without a browser), see §6 below.
3. Wireless Accessory Configuration (WAC)
Specific to Apple iOS devices.
- Mechanism: Uses Apple’s MFi/WAC protocol to pass Wi-Fi settings from an iPhone/iPad directly to the device without manual password entry.
- Status: Detected automatically by iOS when a new SoundTouch device is in setup mode.
4. USB Setup (Legacy)
Primarily used for older SoundTouch Series I and II devices or as a last resort.
- Mechanism: Physical connection via Micro-USB to a computer running the SoundTouch Setup application.
- Process:
- Connect USB cable.
- The desktop app communicates via a proprietary HID or Serial-over-USB protocol.
- The app pushes Wi-Fi credentials.
- References to this exist in the firmware as
lost_USB_connectionandconnect_device(seesetup_wizard.xml).
Technical Details: The “Gabbo” Protocol
The Stockholm firmware contains references to a communication layer called Gabbo.
- File:
setup/js/gabbo_setup_bco.js - Function: Handles the state machine for Wi-Fi connection, account pairing, and error handling during setup.
- Relationship: It appears to be an internal wrapper for the messages sent between the setup client (App or Browser) and the device firmware.
Redirection during Setup
While the soundtouch-service focuses on migrating existing devices, a truly “clean” setup to a custom service would require:
- Intercepting the initial account pairing request.
- Providing a mock “Marge” service that accepts any credentials.
- Patching the
SoundTouchSdkPrivateCfg.xmlduring or immediately after the Wi-Fi connection phase.
5. Factory Reset Button Sequences
A factory reset wipes Wi-Fi credentials, account pairing, and all presets, returning the device to out-of-box state. The exact sequence varies by hardware generation.
Sequences verified against official Bose reset guides in
firmware/FirmwareUpdateGuide/. Confirm the reset succeeded by watching the status LEDs and by verifying the Wi-Fi indicator glows solid amber (setup mode).
| Model | Factory Restore Sequence | Confirm |
|---|---|---|
| SoundTouch 10 | Power on; hold Preset 1 + Volume − for 10 s | Wi-Fi indicator glows solid amber |
| SoundTouch 20 | Power on; hold Preset 1 + Volume − for 10 s | Lights blink L→R, then solid amber |
| SoundTouch 20 Series III | Hold Preset 1 + Preset 6 simultaneously for ~10 s | White LED sweep |
| SoundTouch 30 | Power on; hold Preset 1 + Volume − for 10 s (display counts down 10–1) | Display shows “Hold to restore factory settings”, then restarts |
| SoundTouch 30 Series III | Hold Preset 1 + Preset 6 simultaneously for ~10 s | White LED sweep |
| SoundTouch 300 | Hold Volume − until light bar blinks rapidly (~15 s) | Rapid blink → off → on |
| SoundTouch 10 (alt) | Press and hold the back recessed Reset pinhole for 10 s | Status LED restarts |
| SoundTouch 20 (soft) | Hold AUX for 15 s until display goes blank (settings preserved) | Display blanks |
After factory restore the speaker enters setup mode automatically; no power-cycle is needed.
6. AP Mode Wi-Fi Provisioning via Console
When BLE is unavailable (e.g. when using an Android emulator), use AP mode to push Wi-Fi credentials from the command line. The HTTP steps below (6.2, 6.3) are OS-agnostic; only the Wi-Fi-network-switching commands (6.1, 6.4) are platform-specific — macOS is shown inline, with Linux and Windows equivalents alongside.
6.1 Connect your machine to the Speaker AP
After factory reset the speaker broadcasts an SSID like Bose SoundTouch XXXX. Connect to it:
# macOS — list nearby SSIDs via System Settings → Wi-Fi (the `airport`
# command was removed in macOS Sequoia+); connect (replace with actual SSID):
networksetup -setairportnetwork en0 "Bose SoundTouch XXXX"
# Linux (NetworkManager) — one-shot connect, no password (open AP):
nmcli device wifi connect "Bose SoundTouch XXXX"# Windows — connect via the built-in Wi-Fi menu, or from PowerShell:
netsh wlan connect name="Bose SoundTouch XXXX"The speaker’s web UI gateway is at 192.0.2.1 (verified: ST10 assigns 192.0.2.2 to the client via DHCP).
# Confirm reachability
curl -sv http://192.0.2.1/ 2>&1 | head -40
6.2 Trigger Wi-Fi Site Survey (Optional)
The setup web UI at http://192.0.2.1/ uses the SoundTouch API on port 8090 — the same API as normal device operation. Trigger a network scan first so the speaker finds your SSID:
curl -s -X POST http://192.0.2.1:8090/performWirelessSiteSurvey \
  -H 'Content-Type: text/xml' \
  --data-raw '<PerformWirelessSiteSurvey timeout="5"/>'
6.3 Push Home Wi-Fi Credentials
HOME_SSID="MyHomeNetwork"
HOME_PASS="MyPassword"

curl -s -X POST http://192.0.2.1:8090/addWirelessProfile \
  -H 'Content-Type: text/xml' \
  --data-raw "<AddWirelessProfile><profile ssid=\"${HOME_SSID}\" password=\"${HOME_PASS}\" securityType=\"wpa_or_wpa2\" /></AddWirelessProfile>"
Expected response: <?xml version="1.0" encoding="UTF-8" ?><AddWirelessProfileResponse />
The speaker will disconnect from AP mode and join the home network within ~15–30 s.
6.4 Reconnect to your Home Network
# macOS
networksetup -setairportnetwork en0 "MyHomeNetwork" "MyPassword"
# Linux (NetworkManager) — assumes the connection profile already exists
# (e.g. from a prior manual connect); use `nmcli device wifi connect
# "MyHomeNetwork" password "MyPassword"` instead for a first-time connect.
nmcli connection up "MyHomeNetwork"# Windows
netsh wlan connect name="MyHomeNetwork"Wait ~15 s for the speaker to join the home network, then verify:
# macOS/Linux — discover the speaker's new IP via mDNS.
# macOS: dns-sd ships with the OS. Linux: use avahi-browse (avahi-utils package).
dns-sd -B _soundtouch._tcp local &      # macOS
avahi-browse -r _soundtouch._tcp        # Linux — Ctrl-C to stop
sleep 5 ; kill %1 2>/dev/null           # only needed for the dns-sd form
Windows has no equivalent built-in mDNS browser; use soundtouch-cli discover devices (this repo’s own mDNS/UPnP discovery, cross-platform) or check your router’s DHCP client list instead.
Comparison: Initial Setup vs. Migration
| Feature | Initial Setup | Migration (soundtouch-service) |
|---|---|---|
| Connectivity | BLE, AP Mode, USB, WAC | Ethernet/Wi-Fi (existing) |
| Credentials | Required (SSID/Pass) | Not required (uses existing) |
| Access | Web UI / App protocol | SSH (root) |
| Primary File | setup/index.html | SoundTouchSdkPrivateCfg.xml |
| Use Case | Out-of-the-box / Reset | Redirecting active devices |